


Adresse
1 rue de Saint-Petersbourg75008 Paris
Mail
contact@bam.techTéléphone
+33 (0)1 53 24 00 83When I joined BAM, I realized on my first projects that accessibility was something often forgotten on mobile apps. In fact, taking care of your app accessibility can be quite a challenge, especially on mobile apps: Very few documentation exists on this topic for React Native developers. So it’s time to correct that!
If you are a new React Native developer and are asking yourself about accessibility, or if you are already an expert in hooks and contexts, but you never deep dive into the subject, this article is for you!
Let’s start with the first question about accessibility: why? Maybe you already know the reasons why accessibility is important, but let's recap them here.
First, accessibility targets two types of users. The first one we think about are users with permanent disabilities, like blindness, deafness, and so on. It is difficult to determine the exact number of people affected, but the ONU estimates that it affects one person out of six in the world.
In France, where we have more accurate statistics, if we add other accessibility problems like color-blindness or dyslexia (that are not recognized as disabilities), the number grows up to 1/3 of the population!
.png)
The second type of affected users are… everyone else! Accessibility issues can impact anyone, even those without handicaps. You can have difficulties to see color contrasts (when you use your phone in direct sunlight for example), or to listen the audio of your video in the subway… The list is very long!
These situations are called Situational Disabilities : you are experiencing a disability, like visual impairment or deafness, because of the context you are in or your environment. It can happen to everyone and produces, from the point of view of an app, the same result as a regular disability.
Last but not least, if you try to convince your boss to tackle accessibility: the LAW 😱. More and more countries in the world make policies to enforce companies to make their product accessible. For example, the European Accessibility Act mandates that nearly all public digital services available in Europe must be accessible by 2025, if you didn’t hear about that.
There are two main categories of accessibility issues on smartphones. The first one concerns the design or features issues. It can be, for example:
If you wish to knew more details about this type of issues, you can check others articles to learn more about it: The power of accessibility personas in web development and Improve the accessibility of your digital product for a better user experience.
The second category, which is more relevant for mobile developers, is about technology issues. These are specific accessibility features, already available in the Android and iOS systems, that your app should be able to support. Let’s focus on the 3 most important accessibility features:
If you want to learn how to use all these accessibility features of a phone, please check out these guides:
Indeed, testing your app with each of this setting can be very time-consuming and boring. That’s why we have some tools to help us deal with accessibility!
Let me introduce you to your new friend, which will greatly help you during your accessibility journey: the Accessibility Inspector! It is already installed by default with Xcode, so you can just search it with Spotlight to open it.
The Accessibility Inspector comes with 3 features:
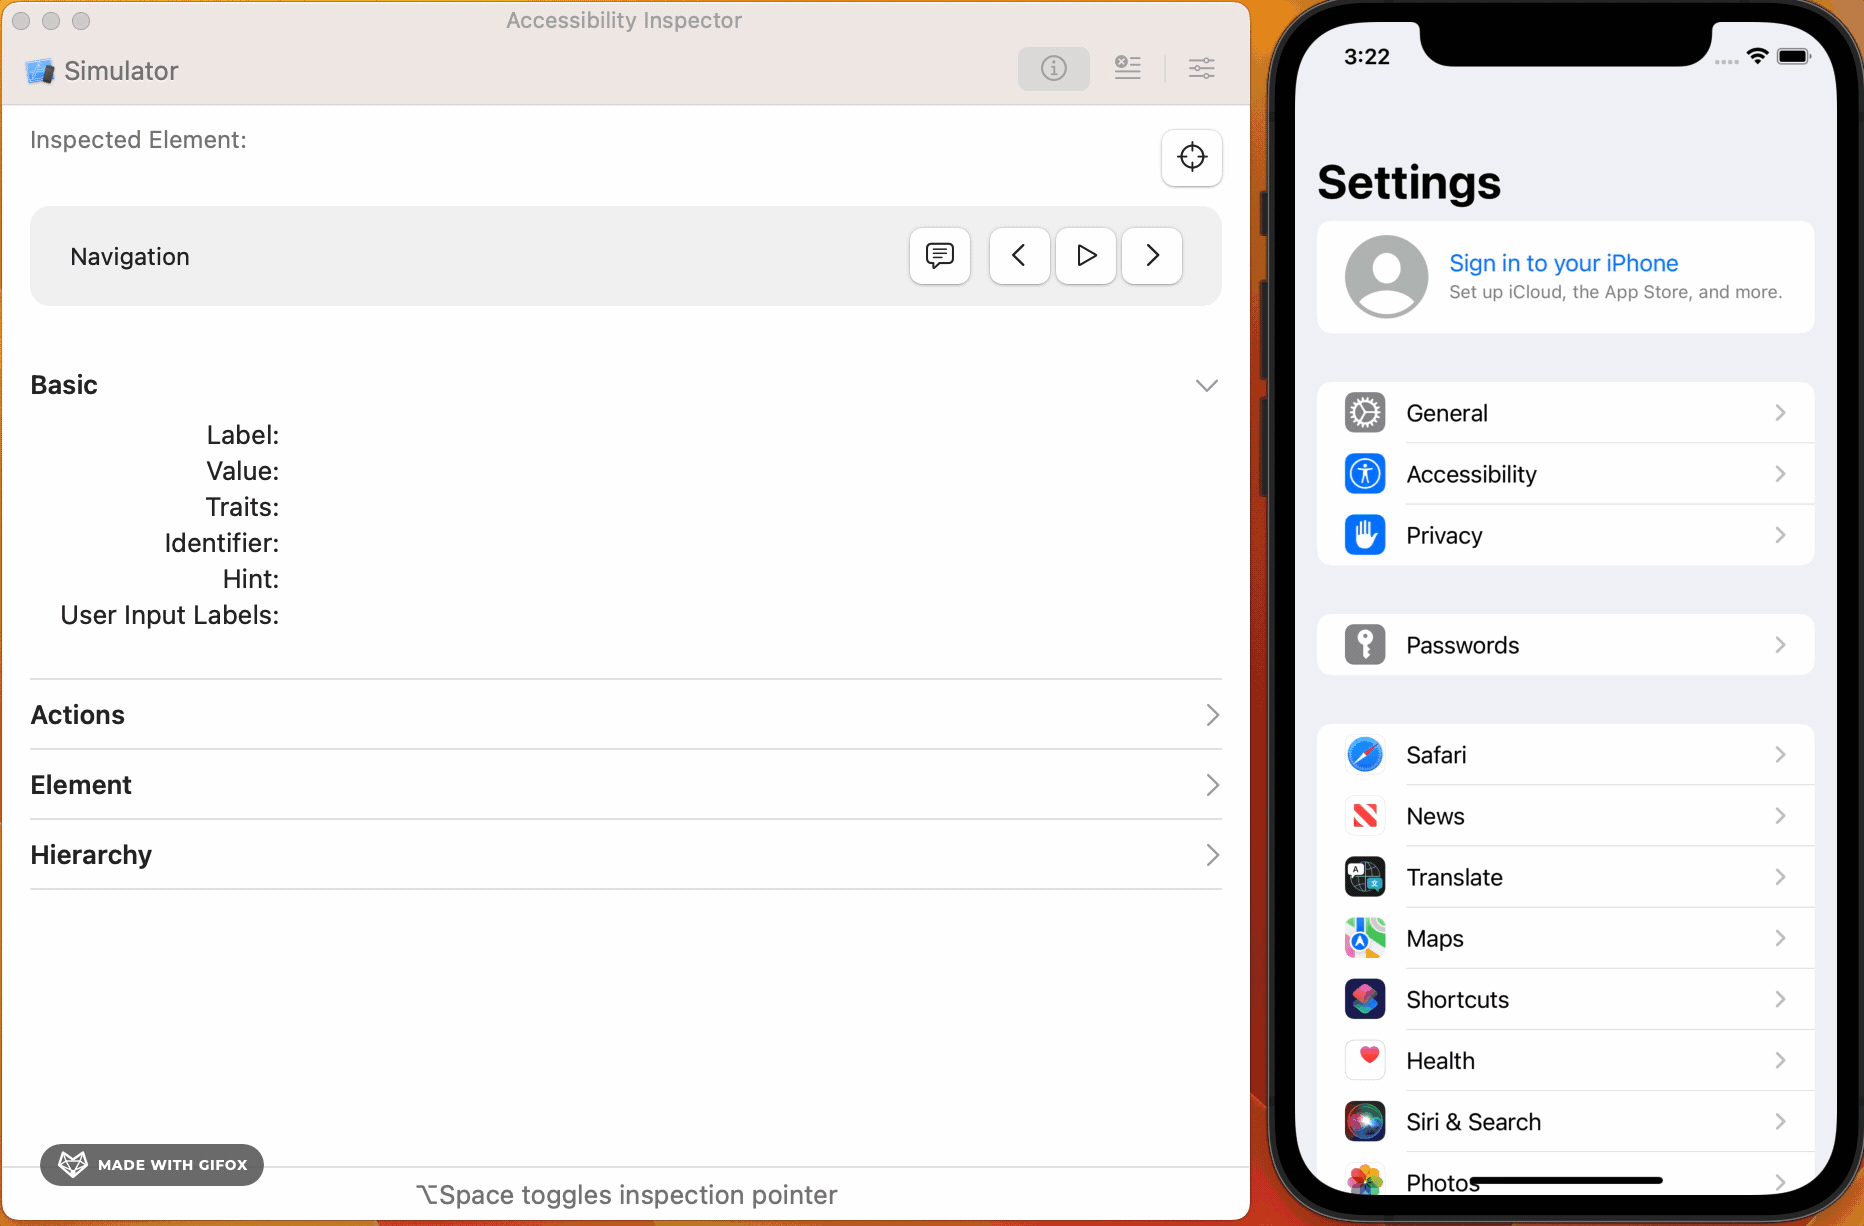
Amazing, right? 🤩 Now, you're ready to check your app for accessibility!
If you also want to check your app on a real device without using a simulator, you can install the Accessibility Scanner for Android. It allows you to run larger audits on your app, and offers more checks and solutions in my opinion. And if your app is published, you can also find automatic analysis from the Accessibility Scanner in the Play Console!
Now that you’re aware of the theory and tools, let’s see how you can implement all of that in React Native. We will only focus on screen reader and switch control, since the other accessibility issues mainly concern the design of your app.
Accessible components are at the core of React Native accessibility. They are React components that can be focused by the user, and always possess a role and a label. A component is considered as accessible if its ++code>accessible++/code> property is set to ++code>true++/code>.
It is worth noting that there are some limitations in React Native (the latest version is 0.72 at the time of writing):
By default, it is preferable to always add the ++code>accessibilityRole++/code> and ++code>accessibilityLabel++/code> props. Even if they have default values, you can end up with some unexpected behavior if you omit them.
There are also some other properties you can use to make your app more user-friendly. The most important ones are ++code>accessibilityState++/code> and ++code>accessibilityValue++/code>, which can indicate the different states of a component, for example when a button is disabled or in a loading state (check the docs for more details). There is also ++code>accessibilityHint++/code>, which gives more precision about what does the component when actioned (the label should remain short).
Feel free to check out the React Native documentation for more properties!
Now let’s see a more complex example to sum up all what we’ve learned! Here is a simple checkbox, with a loading state, made fully accessible:
And here is the result 🥳 :
.gif)
So what have we done here? First, we wrap the checkbox icon and the associated label in a single Pressable component: this allows users with mobility issues to check or uncheck the component by pressing the label.
Then, I add the Role of the component for screen readers, ++code>"checkbox"++/code>, and the Label that would be read in place of the checkbox label. This way, we ensure that the icon label will not be read by the screen reader, and it also allows us to use a clearer text for screen reader users. We also add a Hint to indicate what happens when the checkbox is checked.
Note that we did NOT indicate the word “Checkbox” in the label. This is because it will be automatically added by the screen reader using the role prop, so we don’t need to add it twice!
We also did not add the prop ++code>accessible={true}++/code>: this is because Pressables, unlike Views, are already accessible components by default! This is useful in most cases, but can be problematic if you nest Pressable components.
Finally, we add some custom properties specific for the states. The ++code>accessibilityState++/code> property will indicate to the user if the checkbox is ticked or not, and the ++code>accessibilityValue++/code> indicates if the checkbox is loading.
And that’s all, we made a fully accessible checkbox!
Accessibility can be very tricky to deal with: there are a lot of things to check and quite a few lines of code to add! Hopefully, you can use default components from React Native or components libraries to avoid re-writing all your components from scratch. React Native and Android or iOS are also smart enough to add labels and roles by default, even if you did nothing, but they are still limited!
If you are interested to learn more about accessibility, please be sure to check the Mobile A11Y website from Rob Whitaker. It contains a lot of useful resources and some quick wins to improve your app accessibility rapidly!


Le BAM Innovation Lab, pour rester à la pointe des dernières innovations tech et produit !


