


Adresse
1 rue de Saint-Petersbourg75008 Paris
Mail
contact@bam.techTéléphone
+33 (0)1 53 24 00 83Once upon a time, when I was but a rookie. I knew little about SwiftUI, except that "You cannot modify existing views in SwiftUI, you always pile up new ones onto the others". While working on a project, I encountered this design I had to implement.
"No worries", did I thought ; and so I went and started replicating this card in SwiftUI. Here was the resulting code:
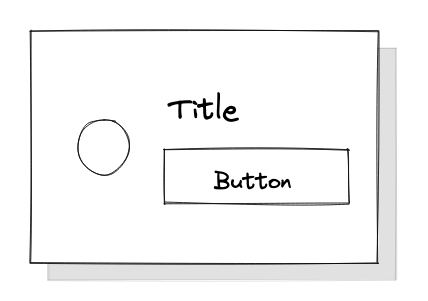
I fired up my simulator, confident I would swiftly see the cherished design ; yet, I was confronted with this instead (don’t question the colors, please):
.png)
Ew.
This is definitely not what we wanted. Not only this, but it's quite ugly: we cannot even pretend it's an "accidental feature" ; we have to fix it. My first two actions as a developer were:
During the latter operation, I am surprised: I had expected to see my shadows in the hierarchy as a ++code>ZStack++/code>, exactly as if a ++code>background++/code> modifier was used. Instead, I could not find any component related to shadows.
This prompted several questions which ultimately led me to reconsider and widen my understanding of SwiftUI:
In this article, I would like to offer you to travel with me on an unexpected path straight through the tech history behind SwiftUI.
Side note: of course, we could also search on the vast internet for an answer and we would quickly be presented with a solution, but I will deliberately ignore it for the moment; let's start digging in the rendering peculiarities until we better understand what happens there exactly.
Beyond the "design" itself, something is odd: I don't see any shadow in the view hierarchy. Indeed, we can see that no component is added to the view hierarchy when we use the ++code>shadow()++/code> modifier, contrarily to what happens with other modifiers. ++code>background()++/code>, for instance, will encapsulate the original view as well as the desired background within a view (a ++code>ZStack++/code>), which can be seen in the hierarchy.
.png)
On the other hand, we can see a ++code>ShadowEffect++/code> was added to our outermost ++code>VStack++/code> on which we applied to modify.
.png)
To make sure of this, we can remove the ++code>.background()++/code> modifier applied on the ++code>VStack++/code> inside the ++code>Button++/code> ; the squared shadow will disappear along with the background, leaving only that of the text.
To explain this, we can take a look at the history of SwiftUI. It is deeply connected to UIKit, since Apple's engineers did not want to recreate everything from scratch. As such, they took whatever they had created for UIKit and "SwftUI-ed" it; ++code>UIScrollView++/code>, for instance, is used underneath Swift's ++code>ScrollView++/code>. Moreover, it is common that similar components which are not directly linked have similar peculiarities.
Therefore, looking at what UIKit does is generally useful to get a better grasp of SwiftUI quirks. In UIKit, there are no modifiers ; instead, the parameters of the components must be set before rendering. As such, there exist several ++code>shadow++/code> properties, which can be accessed through ++code>UIView++/code>'s ++code>layer++/code> property. This property controls the underlying ++code>CALayer++/code>, which in turn belongs to the Core Animation world.
.png)
We have answered our first question: because shadows are a property of ++code>UIVIew++/code>s, there are no dedicated components in the view hierarchy (which does not show ++code>CALayer++/code>s) ; instead, the view is modified.
We can also update our golden rule: "You cannot modify most existing views in SwiftUI, you always pile up new ones onto the others, except when dealing with shadows".
Next, lets look at our stacks. We would expect to see shadows matching these components, since every subview of our main card gets a shadow. Yet, this is not what we observe. To ensure different shadows are not combined together, we can look at what a plain shadow should look like by adding a plain rectangle to our card.
.png)
Doing this confirms there are definitely no shadows rendered for our stacks. To better understand why, we can take another look to UIKit. In fact, there are at least two different explanations as to why our stacks don't have any shadow.
Interestingly, there exists a component in UIKit which is close to what SwiftUI stacks do: ++code>UIStackView++/code>. When using the most excellent SwiftUI-Introspect library, I was unable to find a direct link ; however, as seen previously, it can still be thoughtful to look at what ++code>UIStackView++/code> does.
Immediately, one can see that ++code>UIStackView++/code> are a "non-rendering view" ; what it means is its ++code>draw()++/code> function will never be called and cannot be overridden. Furthermore, no shadow will ever get drawn for these views. Yet, the subviews it contains and lays out will indeed be rendered. If we assume the behaviour of SwiftUI's stacks are similar to that of ++code>UIStackView++/code>, then we have our explanation.
However, contrarily to UIKit's ++code>UIStackView++/code>, the ++code>shadow++/code> modifier actually does something, even if its not what we want.
Another explanation would be to ignore how the component (whether ++code>View++/code> or ++code>UIView++/code>) is implemented, but rather to focus on how it is drawn: that is, on its ++code>CALayer++/code>. When a ++code>CALayer++/code> with a shadow gets drawn, it undergoes two steps:
As such, if we were to have a fully transparent ++code>CALayer++/code>, the corresponding shadow would be nil!
This would be the best explanation for the behaviour we observe, in my opinion.
Let's go back to what we know about layers. They act exactly as in Photoshop; they encapsulates a drawing, parts of which can be more or less transparent. When the rendering engine gets to our component, it superimposes all those layers and computes the resulting visible pixels. This operation is called "compositing".
.png)
It should be noted that ++code>CALayer++/code>s can have several sublayers ; when it happens, every sublayer is drawn before anything else. What is really interesting, is a tiny little line in Apple's archived docs: "[When the root layer is transparent], the shadow is applied to the layer’s content, border, and sublayers". Ah-ah!! Seems to perfectly fit in with our "transparent ++code>CALayer++/code>" theory for the stacks!
So when the parent layer gets drawn, every sublayer is called to render as well with the shadow applied individually. This is what causes the strange behaviour we are investigating on, great!
..Now, how to fix it?
In essence, the answer is quite simple: instead of drawing every sublayer with the shadow individually, we should draw them as a group and then apply the shadow. In UIKit, it is possible to use ++code>CALayer++/code>'s ++code>shouldRasterize++/code> although it is not exactly what it is meant for. ++code>shouldRasterize++/code> will render the ++code>CALayer++/code> separately and cache it before doing any compositing, which is to say before applying the shadow. This is meant to enable Core Animation to keep a cache of computationally expensive renders, at the price of an increased memory consumption. It should also be used wisely, as it performs off-screen rendering, which in turn introduces a context switching which can be counterproductive, performance-wise. Regardless, accessing this property every time we have a complex stack of layers is tedious.
Instead, we have two SwiftUI modifiers whose purpose is exactly what we need:
If we add the ++code>compositingGroup++/code> modifier right before our ++code>shadow++/code> modifier as in:
Here is what we get:
.png)
Exactly what we want!
It should be noted the same result can be obtained using any modifier that clips the view, such as ++code>clipped++/code>, as it will trigger off-screen rendering of our view; however, it is not advised to use clipping modifier in lieu of ++code>compositingGroup++/code> as it can have side effects on the presentation. Additionally, ++code>drawingGroup++/code> can negatively affect the performance of your app. You can check where in your app off-screen rendering is performed by toggling Debug > Colour off-screen rendered in your simulator.
With this deep dive in SwiftUI, then UIKit and finally Core Animation rendering, we hopefully all better understand some quirks of iOS visual programming. Never go without your ++code>compositingGroup++/code> modifier again!


Le BAM Innovation Lab, pour rester à la pointe des dernières innovations tech et produit !


